
After several months of trying to figure out how to use a Baofeng as a TNC for things like APRS tracking, I finally found a method that works.
The Parts List
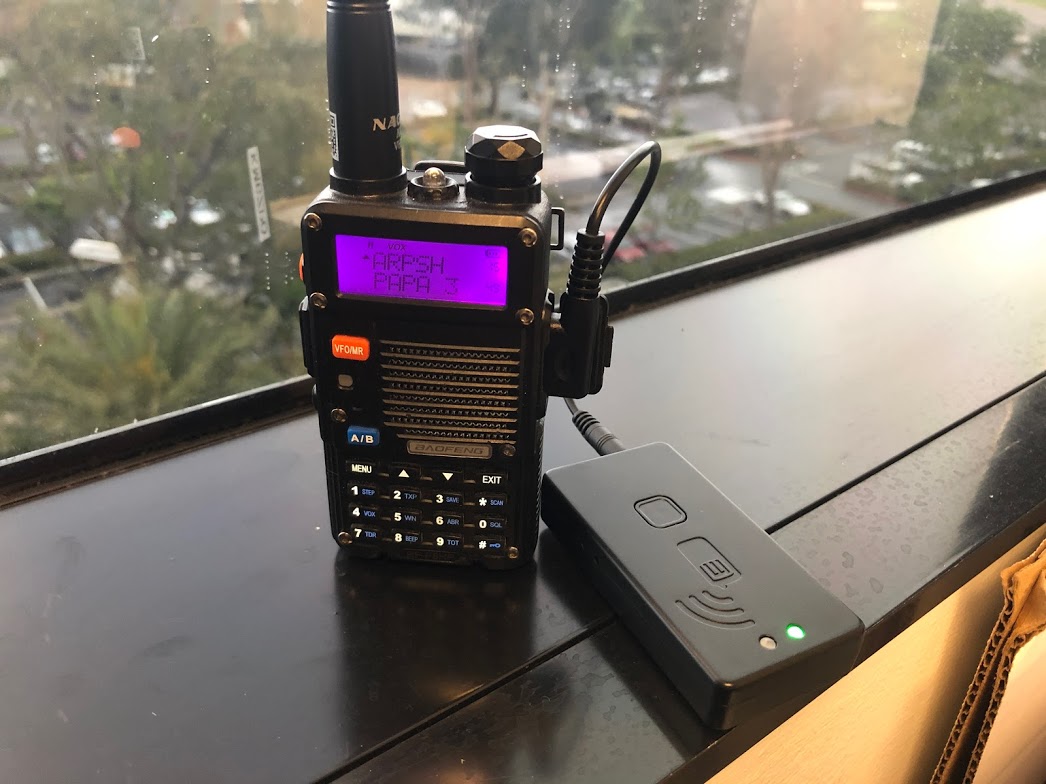
- BaoFeng BF-F8HP
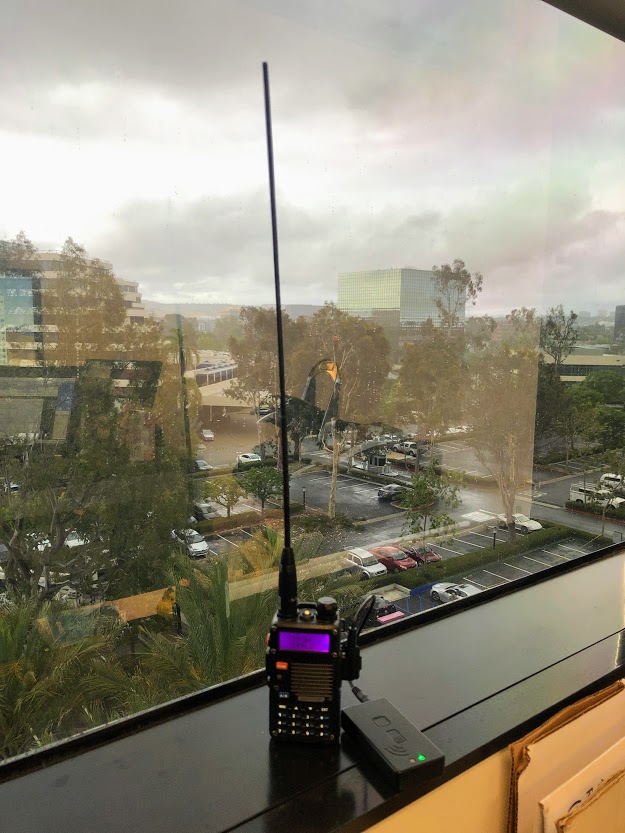
- Nagoya NA-771 15.6-Inch Whip VHF/UHF (144/430Mhz) Antenna
- Mobilinkd TNC3
- TNC Cable to connect TNC3 to Baofeng
- ZEXMTE Bluetooth USB Adapter
- A laptop running Windows 10
- PinPoint ARPS v2
Undoubtedly the most frustrating part of this process has been figuring out how to get any device to consistently talk to the Mobilinkd TNC3 and in turn to a radio to send valid data over the air. Before I figured out this solution, I tried using mobile apps like APRSDroid and APRS.fi for iOS and APRS Pro Ultimate for iOS.
Along my journey I was told by people who seemed to know more about radios than myself that Baofeng radios just weren’t going to work. I tried upgrading to a Yaesu FT-60R, but could not find the right cable to connect it to the TNC3. I eventually ended up buying a Kenwood TH-D72A, thereby eliminating the need for the Mobilinkd TNC3. As the TNC3 sat on the shelf collecting dust, I decided to find a way to use it. This article is the result of several months of research, numerous emails back and forth with Mobilinkd and other vendors, numerous YouTube videos on the subject, and a lot of banter on social media groups. I’m glad to say I finally did it.
Baofeng BF-F8HP Settings
- Set frequency to 144.390 (SIMPLEX only – no tone or CTCSS)
- Set VOX to 1
- Set STE to OFF
- Transmit power should be HIGH
- Set squelch to 1
- Twist the volume button to about half way
Location matters. If you’re not receiving data, you’re not going to be able to send data either!
MOBLINKD TNC3 Settings
I used the Mobilinkd TNC config app for iOS to edit the settings. The following settings worked for me.
- Audio input: the apps says open the squelch. I left it set to 1 and just waited for transmissions. I have input gain level set to 4 and input twist level set to 5dB.
- Audio output: Leave as-is (you can’t edit it anyway). Mine shows Audio Output Gain: 129 and Audio Output Twist: 50. You can use this setting to test that the TNC is actually sending a signal. (Use another radio to monitor your transmission.)
- Power settings: entirely up to you.
- KISS Parameters:
- TX Delay: 50
- Persistence: 128
- Time Slot 10
- Full Duplex: OFF
NOTE: You may have to tweak the TX Delay to make this work.
Bluetooth Serial Comm Port Settings
This article assumes you know how to install the Bluetooth USB dongle. Use the Mobilinkd TNC config app for Windows to figure out which of the two Bluetooth comm ports is being used by the TNC. Port settings (default):
- Bits per second: 9600
- Data bits: 8
- Parity: None
- Stop bits: 1
- Flow control: None
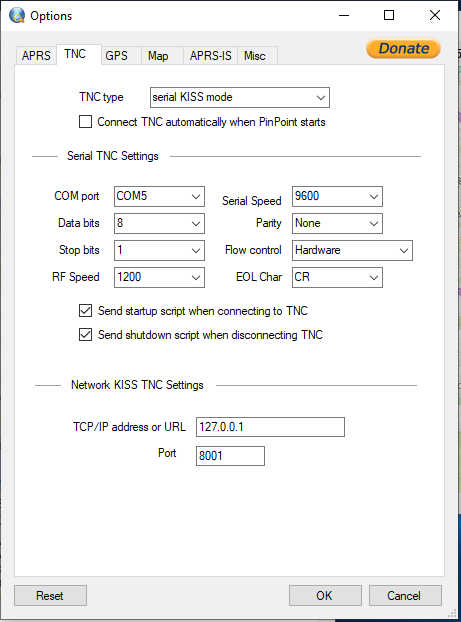
PinPoint ARPS TNC Settings
- TNC Type: serial KISS mode
- COM port (refer to Mobilinkd TNC settings)
- Serial speed: 9600
- Data bits: 8
- Parity: None
- Stop bits: 1
- Flow control: Hardware (yes, different than the comm port settings above)
- RF Speed: 1200
- EOL Char: CR
- Send startup script when connecting to TNC: CHECKED
- Send shutdown script when disconnecting TNC: CHECKED
The Field Test
My operating environment was my 5th floor office in Newport Beach next to a window facing the digipeater. The nearest digipeater able to pick up my beacon was 5.25 miles away. It would have been exactly line of sight except for a couple buildings directly in the path slightly higher than my view. For this test, I used only radio data. I did not collect information via APRS-IS.
 I set the radio to 144.390 and made sure that the PinPoint APRS software was receiving data from the radio by opening the Comm Monitor Window. Within a few minutes the position reports started coming in. By the time I finished editing this article, I had 97 position reports from Santa Barbara to the Mexico border.
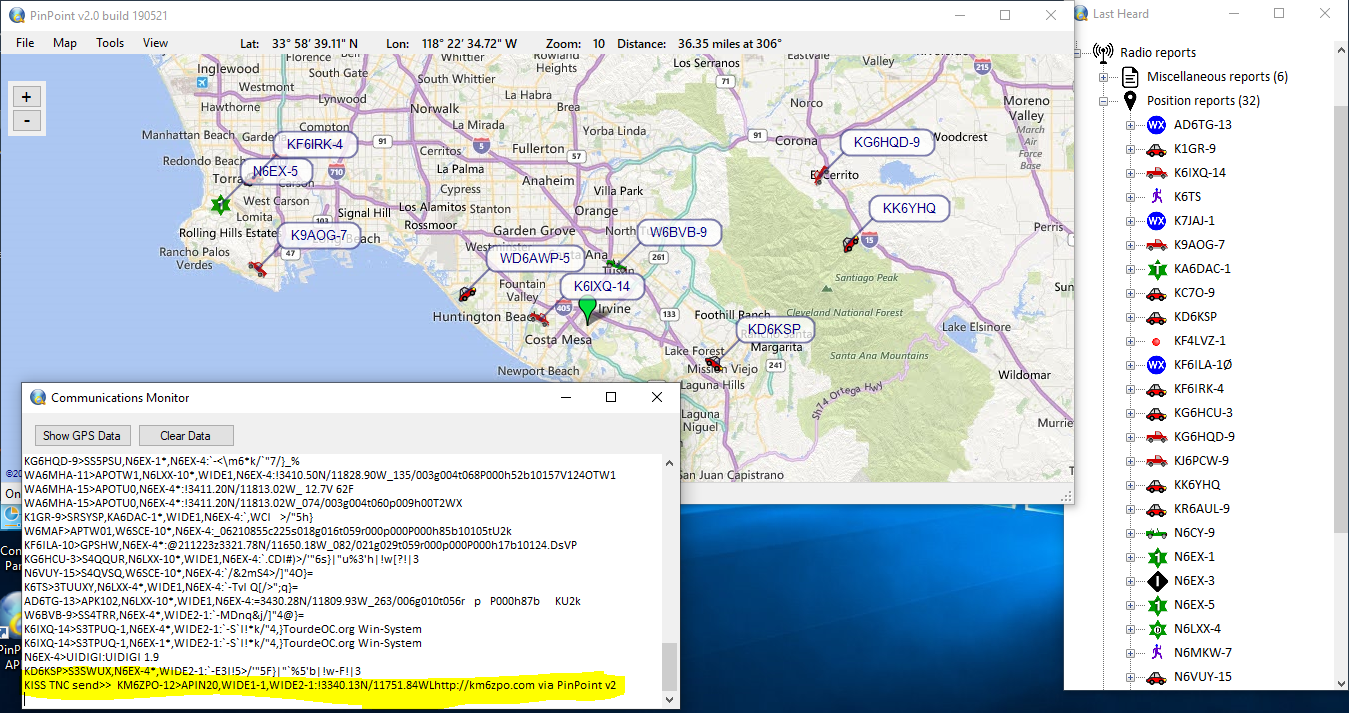
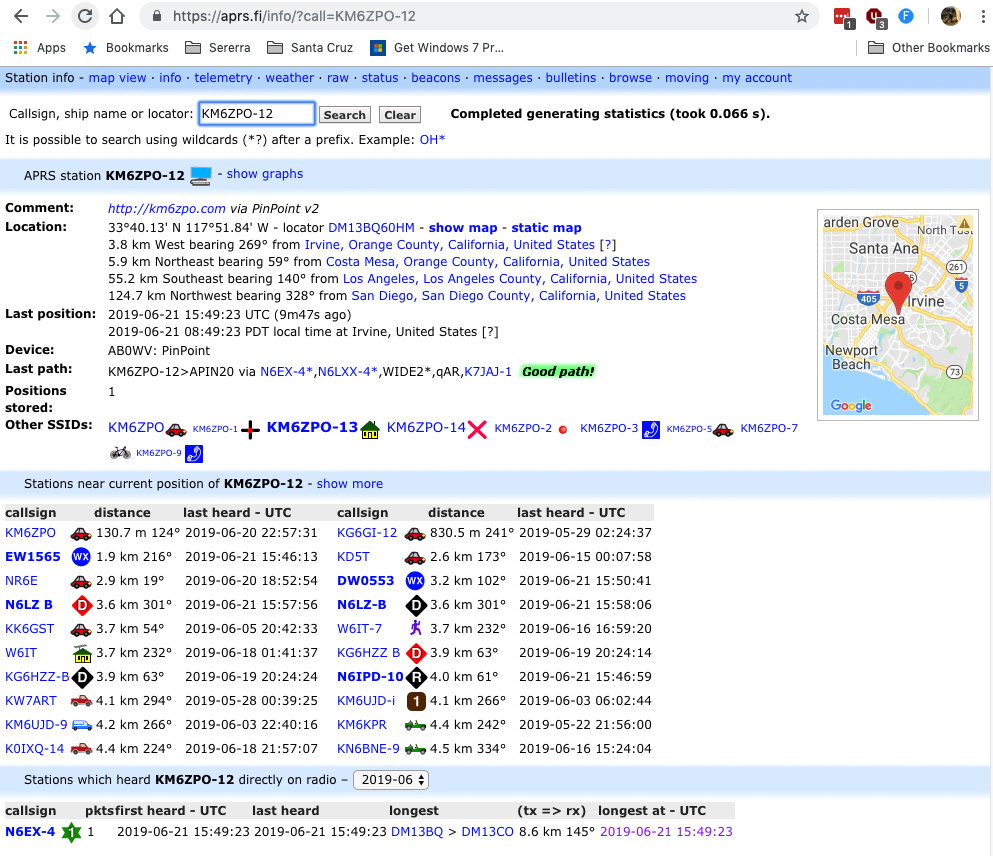
After setting my position within PinPoint APRS, I sent out a position beacon. You can see the data being transmitted in the screenshot above from KM6ZPO-14. NOTE: It took a few tries but it eventually worked. I imagine due to the fact that so many other people are transmitting on this frequency with more power than the Baofeng, that sometimes the beacon just doesn’t make it to the digipeater. Also I should note that without a GPS receiver tracking your position you’ll need to change your location slightly to get the digipeaters to not drop perceived duplicate packets. I had to transmit once at one manually selected location and then again at another to simulate movement. Also, you will not see your own radio-received position on the PinPoint APRS map until you report at least two locations.
You can view all the beacon data for this transmission here:
https://aprs.fi/info/a/KM6ZPO-12
Conclusion: It Works
I consider this to be a nice backup solution for tracking and reporting positions over APRS. The PinPoint APRS software can also be used for messaging as described in my previous article. I wouldn’t use it as my primary solution, but if this was all I had (or all I could afford), I feel comfortable knowing that this solution could be used.
You will of course want to have spare batteries or a power source on hand for the radio, the laptop and the TNC. I should also note that the antenna and your position in relation to the nearest digipeater and environmental factors make a huge difference. You can greatly increase the transmission quality with a larger antenna. I’ve never been able to get this to work using the standard rubber ducky included with the radio.