
Over the past year, I have experimented with a lot of antennas trying to find a good combination of gain and portability since the majority of my contacts are in the field. I will summarize my observations and make some recommendations broken down into two categories: packable and transportable. There are plenty of good vehicle-mounted and home base antennas to talk about, but since this article is about emergency communications in the field (as in, on foot or on a bike – my experience), I won’t discuss those here.
Packable Antennas
By “packable”, I literally mean an antenna that can be put into a backpack for transport. These are my favored type of antennas because I do a lot of mountain biking and hiking and like to make QSO’s while I’m out enjoying the great outdoors.
Before I talk about these antennas, let me talk first about why standard “ducky” antennas and “whips” aren’t the best choice for long-range communications.
Standard Ducky Antennas
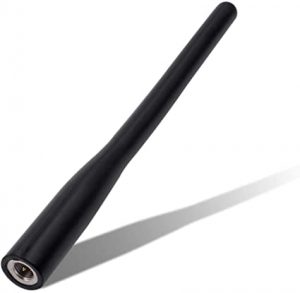
“Ducky” antennas, measuring approximately 6 inches long are included with most radios. They’re named “ducky” because they are generally made from a soft rubber of flexible plastic. Aside from “shorty” antennas (about 2-3 inches long), they are the least effective of all antennas. They are good enough for repeater use, but even then they’ll be scratchy and unreliable. My advice: leave those in the box when you buy a new radio and at least get a “whip”.
Whip Antennas
There’s a whole sub-market of whip antennas ranging from the cheap Nagoyas to the more expensive brands like Diamond, Comet, Signal Stick and others. My favorite whips are the super elastic signal stick (because it can literally be spooled up like a piece of wire) and the Diamond SRH320A tri-bander (because it has the best gain of all HT antennas I’ve tried and works well with all my radios – 2M/70CM/1.25M). I also have tried many of the lower-end antennas like the Nagoya NA-771 (2M/70CM) and the Nagoya NA-320A (tri-band 2M/70CM/1.25M). I use the NA-320A on a HESENATE HT-5RX3 Tri-Band Handheld Transceiver and get fairly good quality to my local 220 repeaters about 15-20 miles away.
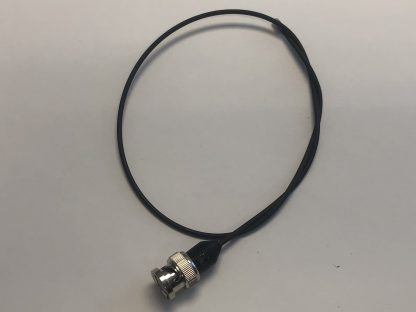
There are plenty of others I’ve tried, but I mention all of the above because they all work well in the field. My only complaint with any of these antennas: I lost one of my super elastic signal sticks in the field on a mountain bike ride. But that’s because of my mount choice: BNC. That would not have happened if I had it screwed into the radio.
Like ducky antennas, whip antennas have limitations, most notably they aren’t great for long-distance simplex communications in areas with buildings, mixed terrain (i.e. rolling hills) and areas with tall buildings. However, if you have decent elevation to get over all the line of sight obstructions, you can have a simplex QSO with decent quality about 10-20 miles away. Location and elevation are key for using whip antennas. Even a hundred feet of elevation makes a huge difference!
Tactical Fold-Up Antennas
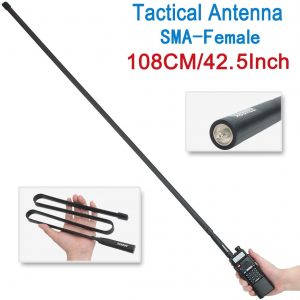
These antennas are in a class of their own. They are what they sound like: foldable. I have an Abbree 42.5″ tactical folding antenna which has been proven to have very low SWR and outstanding gain – almost as good as a mobile-mounted antenna of equal size! These can be used on any radio, but with the connector designed for cheap radios like the Baofeng UV-5R.
The Abbree 42.5″ antennas are a significant upgrade over ducky and whip antennas. The only downside of them is the size – HUGE! But they are great for back-country emergency communications and friendly QSOs so long as you’re not walking or riding around with them while they are directly connected to the radio. The weight of these antennas could cause damage to the antenna connector on your radio if not handled carefully.
I would recommend holding the base of the antenna with two fingers while using the radio! I haven’t tested it, but you could also get a small SMA extension cable to hold the antenna in one hand and the radio in the other.
Check out this great video demonstration showing the impressive SWR of this antenna.
There’s also a detailed test in this video of a smaller version of this antenna.
The Ed Fong DBJ-2 Roll-Up Antenna
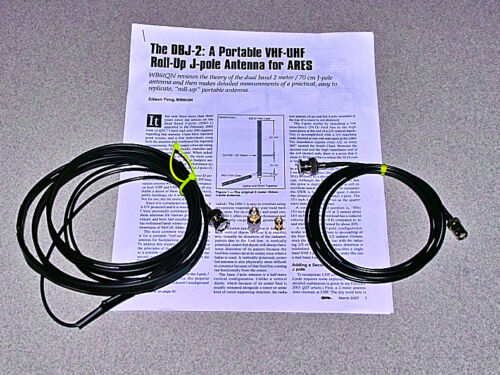
Ed Fong is an instructor of wireless communications at UC Santa Cruz – Silicon Valley. His antennas are built by students of the class at cost and all our tuned and tested before delivery. His antennas are well known in the emergency communications community for their quality, durability and portability. These antennas are sold exclusively on Ebay. The one shown here is for VHF/UHF but they also make a 1.25 (220) base antenna that I’ll discuss later.
I bring one of these with me on back-country rides along with a 20 foot piece of paracord rope to hang it from tree branches. My longest simplex QSO was from the Mount Laguna area to Yuma Arizona (115 miles away) with a 5 watt radio! The signal report was “scratchy, but readable” and the guy on the other side was pushing 100 watts from his home base station. But regardless, that was an impressive distance!
The only downside of the Ed Font DBJ-2 is the fact that it needs to be hung from something. But that’s a minor inconvenience for the results you’ll get using this antenna. Everyone involved in emergency communications should have one of these in their go bag.
Bonus: If you don’t mind 5 pounds of extra weight in your backpack, you can build a packable PVC antenna mast with these instructions.
The Arrow II Satellite Antenna
Arrow doesn’t specify the gain on their antennas, but I think their reputation speaks for itself. If you can communicate via a satellite orbiting over the earth a thousand miles away, that says something about the Arrow II Satellite Antenna! Whether you are trying to catch a “satellite bird” QSO or just want a high-quality, packable long-range antenna, this one is the by far the best choice. This directional yagi antenna can out-perform many omni-directional base station antennas! Over a ducky or whip antenna, there’s just no comparison. This antenna rocks!
You can use this antenna for either VHF or UHF on separate radios with separate connections (although I wouldn’t recommend keying up simultaneously), or if you have the optional duplexer and a duplex-cable radio (for example, the Kenwood TH-D72A, you can operate VHF and UHF (i.e. separate uplink / downlink frequencies) on the same radio. You can operate on a single band (like VHF as seen in the photo above) or dual band by installing all the radials included. I usually work just 146.520 for simplex QSO’s, leaving the UHF radials in the bag.
As an emergency communications antenna, this one offers outstanding range. A couple downsides to mention though are that it’s a delicate antenna and difficult to assemble the first time. Word of advice: mark the radials and practice assembly many times before an emergency happens. It’s also one of the more expensive antennas at $99.00 for the standard non-duplex version. But if you’re not working satellites, that’s all you need. You’ll probably also want to invest into some kind of bag for transport. A heavy-gauge vinyl bag is included, but who knows how long it will last.
You can hand-hold the antenna or carry a tripod with you to mount it. Since it’s lightweight, the cheapest tripod you can find will be sufficient. When I don’t have to carry the extra weight of the tripod on my back, I use a more sturdy tripod.
I have been consistently successful having clear simplex QSOs with a handheld 5 watt radio 50 miles away with this antenna. And of course for repeater operation it’s just remarkable. If you were on top of a mountain with this antenna, a hundred mile QSO is most definitely in the realm of possibility with this. Check out the video below of K6UDA making is first satellite QSO with the Arrow II Antenna.
Transportable Antennas
Transportable antennas have similar gain and quality compared to average base station antennas, but can be broken down and transported in a car for field use. They could also be used for permanent installations.
The Copper J-Pole
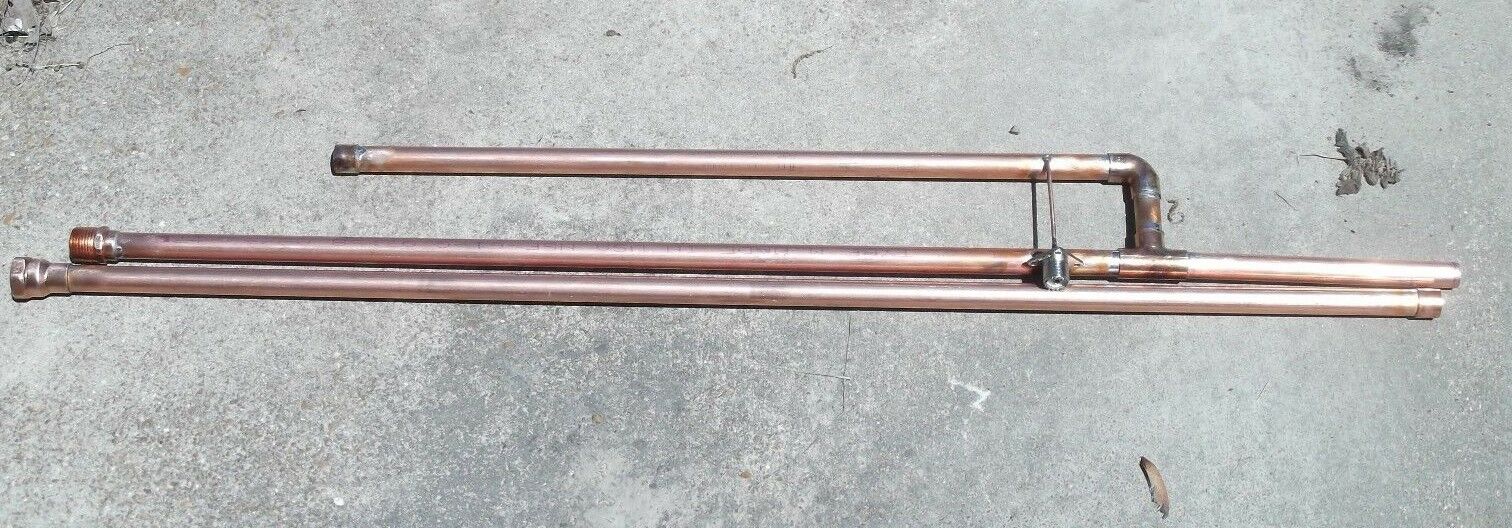
There are plenty of technical plans available online to build your own copper j-pole antenna, but for about the same money you can buy one. You’ll find plenty of options available on Ebay but if you don’t know have the tools to check frequencies and SWR, you would be better off buying for a reputable source like KB9VBR.
Used copper j-poles can usually be found for about $30 while the new ones will run you about $40-70 depending upon where you get it.
One drawback of the cooper j-pole is that it’s tuned to resonate perfectly on the 2 meter band. It may work on 1.25M on 70cm as well, but with higher SWR that could diminish the gain, and at worst, could damage your radio. Experiment with other bands at your own risk!
There are all sorts of ways you can mount the copper j-pole in the field. For example, you could buy an umbrellas stand and set that on top of a picnic table. I use a Husky Tripod stand from Home Depot. The tripod is designed for mounting Husky lights, but the light mount at the top comes off with 2 small screws, making it a perfect stand for the j-pole.
I got my copper j-pole second-hand through a Facebook marketplace listing. Without testing the SWR, I hooked it up to a 5 watt radio and had a very clean copy QSO from the city of Orange, using the Catalina repeater some 40 miles away with a guy up in the San Bernardino mountains – first try. So needless to say I think I got lucky with mine with a perfect tune. I have been very impressed with this type of antenna for it’s portability, affordability and quality. Setup is super quick and simple – just two pieces, a tripod and a wire.
Tram 1480 Base Antenna
The Tram 1480 appears to be a knockoff of the Diamond X200A (about double the price) claiming to have the same specifications. This is actually a base antenna intended to be permanently mounted. But since it comes apart into four foot pieces, it can be easily transported in a car.
The challenge to making this antenna useful in the field is the mount. As you can see in the photos above, I used a Husky Tripod stand from Home Depot along with some u-blots and pole mounts to create a suitable field base for this antenna. Since this configuration is a tad top-heavy, I would recommend weighting the tripod with sandbags in the field.
Both Tram and the similar Diamond version claim their antennas have 6 dBd VHF gain; 8 dBd UHF gain. While I have not tested that, compared to other antennas I’ve used I believe it. It is a significant improvement over whip antennas and can also be used with mobile radios up to 200 watts. This whole setup cost less than $100.
The downside to this configuration is that although I’m very careful when assembling the antenna, I’m never quite sure if the inner wire from the bottom section actually has a firm connection to the top section. If I had an antenna analyzer, I could find out for sure!
Ed Fong DBJ-220 Antenna
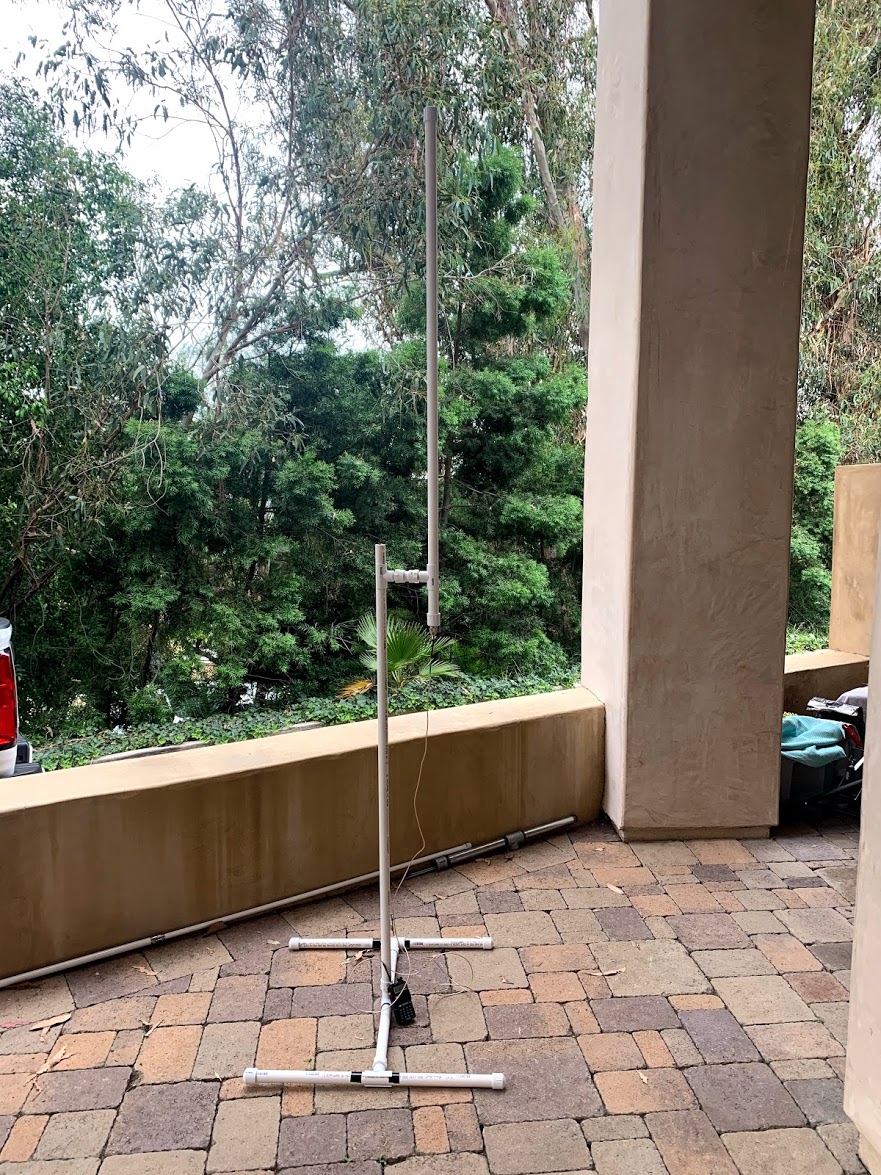

Similar to the DBJ-2 roll up antenna above, this antenna was purpose designed with quality in mind. I use this antenna with a HESENATE HT-5RX3 Tri-Band Handheld Transceiver to access several 1.25M (220) repeaters in my area. There’s an optional tri-band version of this antenna also available called the TBJ-1 at about double the price. Because the fully assembled antenna is only 4 feet long, it fits nicely inside just about any car. Like other Ed Fong antennas, this kit is sold exclusively on Ebay at $30 with shipping.
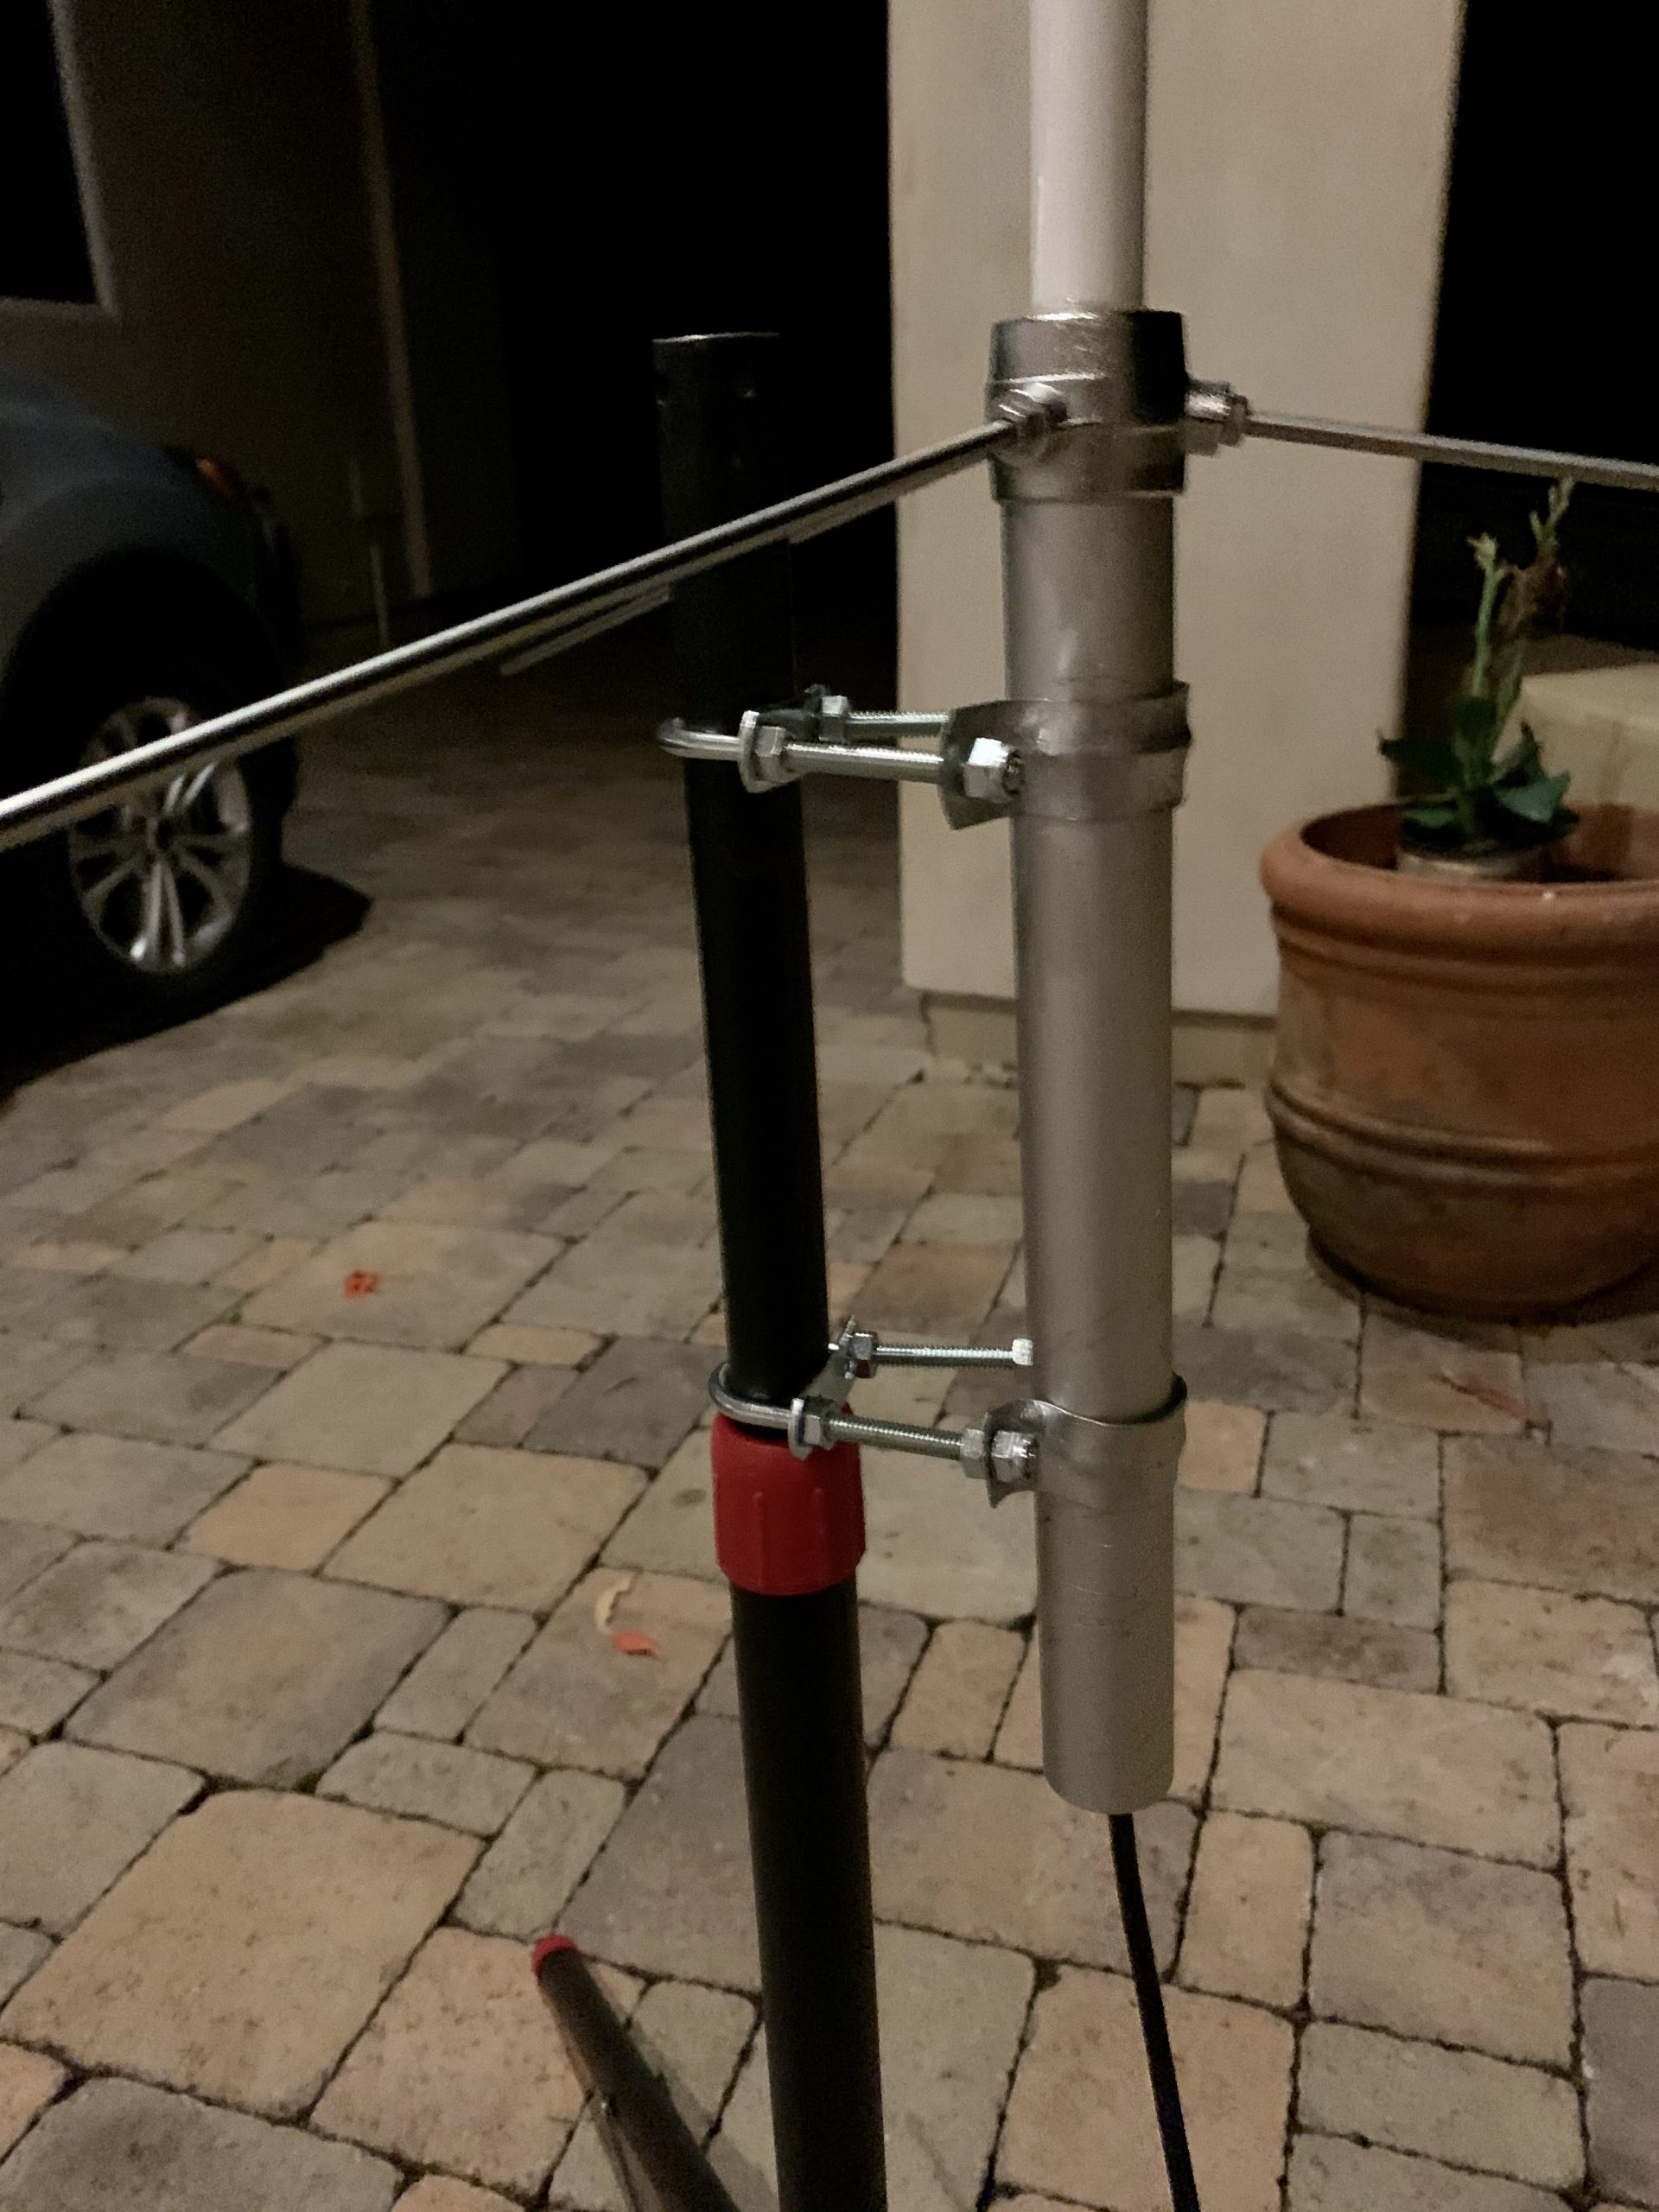
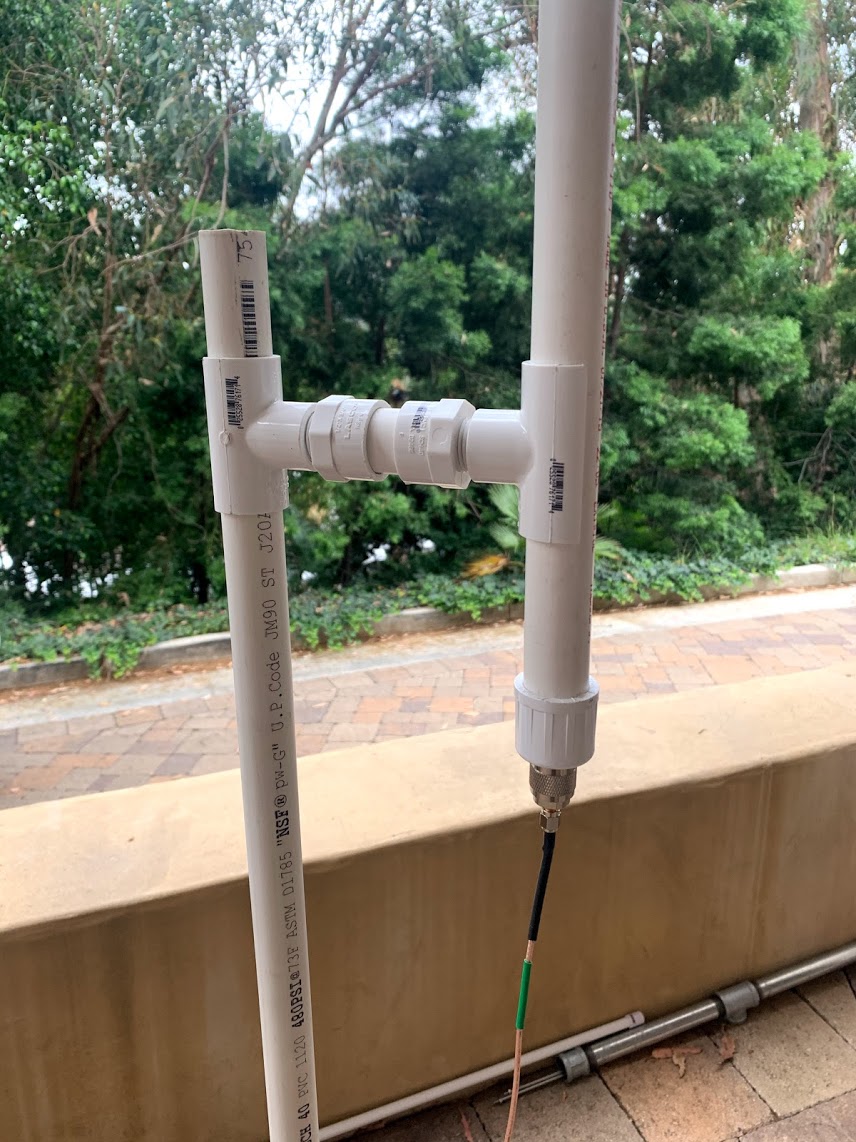
In the mail, you’ll receive the antenna itself with no PVC pipe. I had no problem locating the required 200 PSI pipe from a local Lowe’s store to assemble the antenna. The biggest challenge was in creating a portable mount which I fashioned together with pieces of PVC pipe and special end pieces. Those are hard to find!
You could just hold the antenna in one hand with the radio in the other for field use but a custom-built PVC antenna base as shown in the photos above is convenient and breaks down for easy transport.
PVC Antenna Base Parts List:
- 2 pieces of 3/4″ x 2 feet Schedule 40 PVC Pipe (for the bottom base)
- 2 pieces of 3/4″ x 1 feet Schedule 40 PVC Pipe (for the bottom base)
- 1 piece of 3/4″ x 4 feet Schedule 40 PVC Pipe (the upright which attaches to the antenna)
- 1 piece of 3/4″ x 3 inches Schedule 40 PVC Pipe (goes between the upright and antenna)
- 4 pieces – 3/4″ end caps for the base parts (to stabilize the base)
- 3 pieces – 3/4 female-threaded snap tees (to make assembly / disassembly of the base parts a “snap”)
- 1 piece – 3/4″ tee (for the upright)
- 5 pieces – 3/4″ male-threaded ends (as shown in photos)
- 1 can of PVC glue (for base middle tee one foot sections only – to stabilize the upright from moving sideways)
According to Ed Fong’s technical specifications, this antenna has 2.1 dBi gain. Again, I have no way to measure it currently but I can say in practical use with the HESENATE 5 watt handheld radio, I’m able to have crystal clear conversations via repeaters 50 miles away. I’d say that’s a pretty outstanding for such an inexpensive antenna. You definitely can’t do that with the ducky antenna included with that radio.
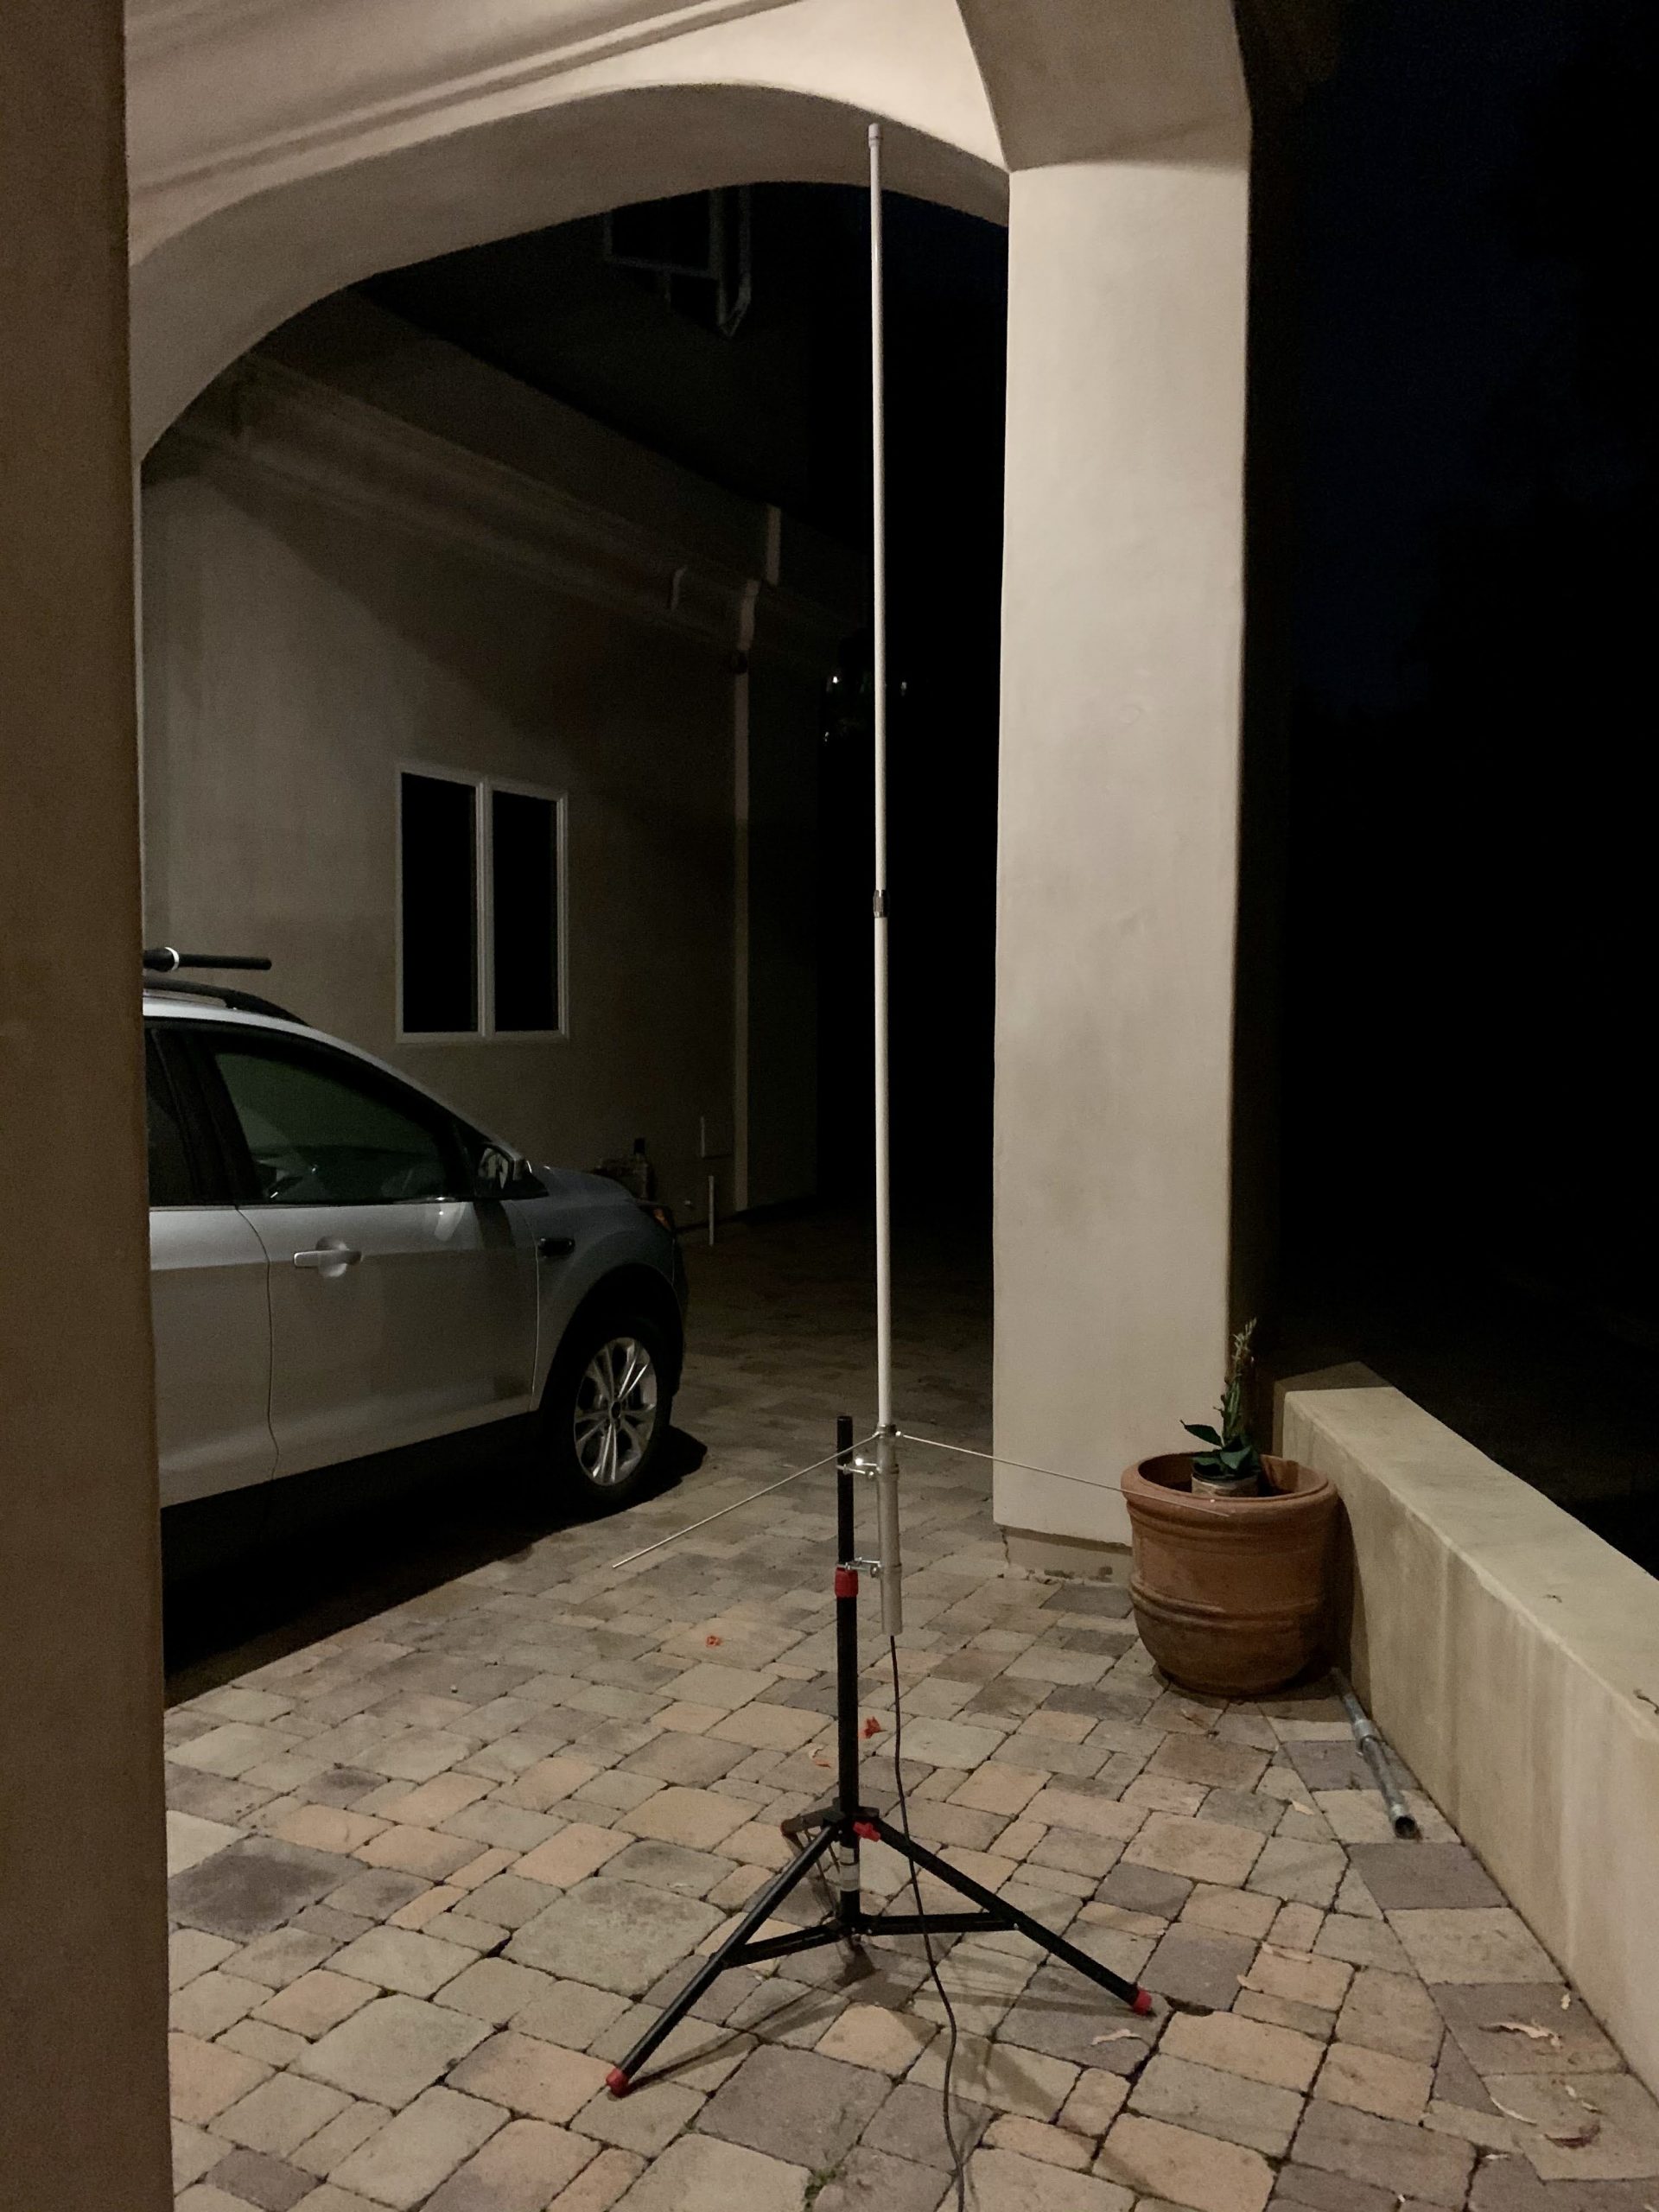
The Ed Fong DBJ-2 Roll-Up Antenna ON A Pole

I mentioned the DBJ-2 as a packable antenna, but it’s also a good transportable base station antenna. In the photo above, you can see it dangling from a 13 foot telescoping fiberglass pole which I found on Amazon for $32.99. There are plenty of other telescoping poles that are longer than this, but with this configuration, I only needed to use what was included in the DBJ-2 kit – the antenna and a 6 foot extension cable. I figured since that was the included, I best only use that to have consistent results with their own tests. If you choose a different pole, make sure it is not metallic as metal (and aluminum) will interfere with the signal. Fiberglass and carbon poles are OK.
To mount this to the ground, you can use just about anything; an umbrella stand would work fine. As a base, I use a 1-1/2 in. x 12 in. brass flanged strainer because it’s thin, durable metal that can be pushed into grass or soft dirt without tools.
To Summarize
As you’ve noticed, there are many ways to improve your signal in the field. An old saying I’ve learned is, “an ounce of antenna is worth a pound of watts”. I’ve also heard, “location and elevation are key”. More power doesn’t always equate to greater gains. In fact, a poorly-designed antenna can destroy your radio! But when you combine all three of the good attributes of antennas, you can dramatically improve your transmission and reception quality. These are all simple and relatively inexpensive ways to make that happen. With a bit of experimenting, you’ll find the combination that works best for you.
Happy Antenna Building, 73!
Mark Warrick, KM6ZPO